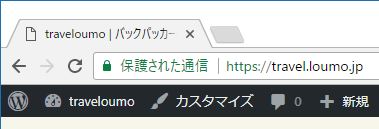
このブログの SSL 証明書はさくらの SSL にあるラピッド SSL を利用したが、ワイルドカードが利用できない為利用したいドメインが複数ある場合はそれぞれ購入しないといけない。SSL 化したい Web サイトは複数あるので、その都度購入するのは金銭的に厳しいものがある。
なので無料で利用できる Let's Encrypt を利用する事にした。
Let's Encrypt - Free SSL/TLS Certificates
Let's Encrypt を利用する際、 certbot コマンドを利用すると簡単に証明書の取得などができる。自分の利用している Ubuntu 14.04 LTS では標準のリポジトリには入っていない為、PPA で追加する。
$ sudo apt-get update
$ sudo apt-get install software-properties-common
$ sudo add-apt-repository ppa:certbot/certbot
$ sudo apt-get update
$ sudo apt-get install python-certbot-apache
これで certbot コマンドがインストールできた。
次に証明書を取得する。
sudo certbot certonly --webroot -w /path/to/example.com/ -d example.com -m your-mail-address@gmail.com
-w でドキュメントルートを、
-d でドメイン名を、
-m でメールアドレスを
それぞれ指定する。
コマンドを実行すると以下のような感じに。途中で利用規約とメールを受信するかを聞かれるのでそれぞれ入力する必要がある。
$ sudo certbot certonly --webroot -w /path/to/example.com/ -d example.com -m your-mail-address@gmail.com
Saving debug log to /var/log/letsencrypt/letsencrypt.log
-------------------------------------------------------------------------------
Please read the Terms of Service at
https://letsencrypt.org/documents/LE-SA-v1.1.1-August-1-2016.pdf. You must agree
in order to register with the ACME server at
https://acme-v01.api.letsencrypt.org/directory
-------------------------------------------------------------------------------
(A)gree/(C)ancel: A
-------------------------------------------------------------------------------
Would you be willing to share your email address with the Electronic Frontier
Foundation, a founding partner of the Let's Encrypt project and the non-profit
organization that develops Certbot? We'd like to send you email about EFF and
our work to encrypt the web, protect its users and defend digital rights.
-------------------------------------------------------------------------------
(Y)es/(N)o: Y
Obtaining a new certificate
Performing the following challenges:
http-01 challenge for example.com
Using the webroot path /path/to/example.com for all unmatched domains.
Waiting for verification...
Cleaning up challenges
IMPORTANT NOTES:
 - Congratulations! Your certificate and chain have been saved at:
   /etc/letsencrypt/live/example.com/fullchain.pem
   Your key file has been saved at:
   /etc/letsencrypt/live/example.com/privkey.pem
   Your cert will expire on 2018-01-15. To obtain a new or tweaked
   version of this certificate in the future, simply run certbot
   again. To non-interactively renew *all* of your certificates, run
   "certbot renew"
 - Your account credentials have been saved in your Certbot
   configuration directory at /etc/letsencrypt. You should make a
   secure backup of this folder now. This configuration directory will
   also contain certificates and private keys obtained by Certbot so
   making regular backups of this folder is ideal.
 - If you like Certbot, please consider supporting our work by:
   Donating to ISRG / Let's Encrypt:   https://letsencrypt.org/donate
   Donating to EFF:                    https://eff.org/donate-le
証明書及び鍵の保存場所が表示されるのでそれを元に Apache の設定を変更する。
$ sudo ls /etc/letsencrypt/live/example.com
cert.pem  chain.pem  fullchain.pem  privkey.pem  README
$ sudo vim /etc/apache2/sites-available/default-ssl.conf
	<VirtualHost *:443>
		DocumentRoot /path/to/DocumentRoot/
		ServerAdmin webmaster@localhost
		ServerName example.com
		SSLCertificateFile /etc/letsencrypt/live/example.com/fullchain.pem
		SSLCertificateKeyFile /etc/letsencrypt/live/example.com/privkey.pem
	</VirtualHost>
Apache の設定を書き換えたら再起動を行う。
$ sudo service apache2 restart
これで https でアクセスできたら OK だ。

最後に Let's Encrypt の自動更新を仕込む。Let's Encrypt は3ヶ月毎に更新が必要な為自動更新は必須だ。これも certbot コマンドで行う事ができる。
更新は certbot renew コマンドを利用すると良い。このコマンドを実行すると更新可能な証明書だけを自動的に更新してくれる。--post-hook を利用すると更新後に実行するコマンドも指定可能なので Apache を再起動する。
$ sudo certbot renew --post-hook "sudo service apache2 restart"
これを crontab に仕込む。
$ sudo vim /etc/cron.d/certbot
0 4 * * 0 certbot renew --post-hook "service apache2 restart"
多分これで動くと思うんだけど昨日仕込んだばかりなので2ヶ月後にちゃんと動いているのか確認したいところ。


コメント
[…] ■さくらの VPS 上の Ubuntu で Let’s Encrypt の SSL 証明書を利用、Https へ移行する https://loumo.jp/wp/archive/20171021120015/ […]