Ubuntu 18.04 の初期設定が終わったら Nginx と MySQL をインストールして WordPress を動かす。Ubuntu 18.04 の初期設定については以下に書いた。
Nginx のインストール
まずは Nginx のインストール。これは普通に apt で入れる。
$ sudo apt install nginx
インストールしたら UFW で HTTP と HTTPS を許可する。
$ sudo ufw app list
Available applications:
  Nginx Full
  Nginx HTTP
  Nginx HTTPS
  OpenSSH
$ sudo ufw allow 'Nginx Full'
Rule added
Rule added (v6)
Nginx が起動中かどうかは systemctl status コマンドで確認できる。
$ systemctl status nginx
  nginx.service - A high performance web server and a reverse proxy server
   Loaded: loaded (/lib/systemd/system/nginx.service; enabled; vendor preset: enabled)
   Active: active (running) since Mon 2019-02-25 15:59:36 JST; 7min ago
     Docs: man:nginx(8)
  Process: 5142 ExecStart=/usr/sbin/nginx -g daemon on; master_process on; (code=exited, status=
  Process: 5140 ExecStartPre=/usr/sbin/nginx -t -q -g daemon on; master_process on; (code=exited
 Main PID: 5143 (nginx)
    Tasks: 4 (limit: 2325)
   CGroup: /system.slice/nginx.service
            5143 nginx: master process /usr/sbin/nginx -g daemon on; master_process on;
            5144 nginx: worker process
            5145 nginx: worker process
            5146 nginx: worker process
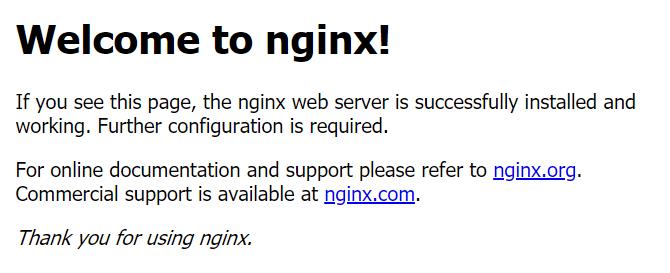
Nginx が正常に動いていればサーバのアドレスに http でアクセスすると以下のようなウェルカムページが表示されると思う。
Nginx 自体の動作が OK なら自分の所持するドメインで Web サイトを見れるようにする。
ドメイン毎の設定は /etc/nginx/sites-available 以下にファイルを作成し記述する。
$ sudo vim /etc/nginx/sites-available/example.com
server {
        listen 80;
        listen [::]:80;
        root /home/ryomatsu/public_html/example.com/;
        index index.html index.htm index.nginx-debian.html;
        server_name example.com www.example.com;
        location / { try_files $uri $uri/ =404; }
}
よく /var/www/ 以下にディレクトリ作っている例を見るけどそこで作業するのだるいし、どうせ自分しかいじらないからホームディレクトリ内に public_html ディレクトリを作ってそこに各ドメインの Web サイトを置くようにしている。
ファイルを作ったら sites-enabled にシンボリックリンクを張る。
$ sudo ln -s /etc/nginx/sites-available/example.com  /etc/nginx/sites-enabled/
$ sudo nginx -t
nginx: the configuration file /etc/nginx/nginx.conf syntax is ok
nginx: configuration file /etc/nginx/nginx.conf test is successful
$ sudo systemctl restart nginx
nginx を再起動する前には -t コマンドで設定ファイルにエラーが無いか確認するべし。
何も問題なければ適当なファイルを公開ディレクトリに置こう。
$ echo 'hello' > ~/public_html/example.com/index.html
これで example.com にアクセスすると hello と表示されるはず。
-- 参考 URL
How To Install Nginx on Ubuntu 18.04 | DigitalOcean
PHP のインストール
WordPress を動かすには PHP が必須なので入れる。
以前は php7.2 を入れるのに以下のように add-apt-repository universe が必要(add-apt-repository コマンドを使うためにも以下のようにいろいろコマンドが必要)だったと思うのだが、要らなかったかもしれない。もうコマンド実行後なのでもはやよくわからない。
$ sudo apt install apt-file
$ sudo apt-file update
$ sudo apt-file search add-apt-repository
$ sudo apt install software-properties-common
$ sudo add-apt-repository universe
わからなければ php インストールする前に apt-cache show php で php のバージョン確認して 7.2 とかそれ以上になってたら良し。
$ sudo apt-cache show php
Package: php
Architecture: all
Version: 1:7.2+60ubuntu1
(省略)
 This package is a dependency package, which depends on Ubuntu's default
 PHP version (currently 7.2).
php をインストールするのだが、Nginx では PHP を動かすのに FPM((FastCGI Process Manager) というものを利用するので php-fpm をインストールする。
$ sudo apt install php-fpm php-mysql
php-fpm をインストールできたら Nginx の設定を変更して php を使えるようにする。
$ sudo vim /etc/nginx/sites-available/example.com
server {
        # index.php を追加して php ファイルを読み込めるようにする
        index index.html index.htm index.nginx-debian.html;
        # 拡張子 php のファイルにアクセス時に php を実行する
        location ~ \.php$ {
                include snippets/fastcgi-php.conf;
                fastcgi_pass unix:/var/run/php/php7.2-fpm.sock;
        }
}
$ sudo nginx -t
nginx: the configuration file /etc/nginx/nginx.conf syntax is ok
nginx: configuration file /etc/nginx/nginx.conf test is successful
$ sudo systemctl restart nginx
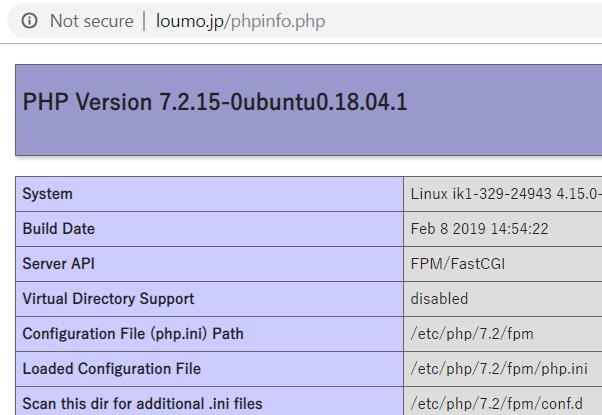
これで php が利用できるはず。試しに phpinfo を表示してみよう。
$ cat public_html/example.com/phpinfo.php
<?php
phpinfo();
これで以下のように phpinfo が表示できれば OK
MySQL をインストールする
最後に MySQL をインストールする。
$ sudo apt install mysql-server
インストールできたら mysql_secure_installation を実行。不要なユーザーやデータベースを削除などしておく。
$ sudo mysql_secure_installation
Connecting to MySQL using a blank password.
VALIDATE PASSWORD PLUGIN can be used to test passwords
and improve security. It checks the strength of password
and allows the users to set only those passwords which are
secure enough. Would you like to setup VALIDATE PASSWORD plugin?
Press y|Y for Yes, any other key for No:
Please set the password for root here.
New password:
Re-enter new password:
Remove anonymous users? (Press y|Y for Yes, any other key for No) : y
Success.
Disallow root login remotely? (Press y|Y for Yes, any other key for No) : y
Success.
Remove test database and access to it? (Press y|Y for Yes, any other key for No) : y
 - Dropping test database...
Success.
 - Removing privileges on test database...
Success.
Reload privilege tables now? (Press y|Y for Yes, any other key for No) : y
Success.
All done!
次に MySQL の root パスワードを設定する。初期状態では以下のように authentication_string 欄が空になっていおり、パスワード無しで利用可能だ。どうせ自分しか使わないサーバーではあるが一応設定しておく。
$ sudo mysql
mysql> SELECT user,authentication_string,plugin,host FROM mysql.user;
+------------------+-------------------------------------------+-----------------------+-----------+
| user             | authentication_string                     | plugin                | host      |
+------------------+-------------------------------------------+-----------------------+-----------+
| root             |                                           | auth_socket           | localhost |
| mysql.session    | *THISISNOTAVALIDPASSWORDTHATCANBEUSEDHERE | mysql_native_password | localhost |
| mysql.sys        | *THISISNOTAVALIDPASSWORDTHATCANBEUSEDHERE | mysql_native_password | localhost |
| debian-sys-maint | *AF8E40088B96EC190F9F1F606BC5CBEC293E26FE | mysql_native_password | localhost |
+------------------+-------------------------------------------+-----------------------+-----------+
mysql>
mysql> ALTER USER 'root'@'localhost' IDENTIFIED WITH mysql_native_password BY 'PASSWORD';
mysql> flush privileges
mysql> SELECT user,authentication_string,plugin,host FROM mysql.user;
+------------------+-------------------------------------------+-----------------------+-----------+
| user             | authentication_string                     | plugin                | host      |
+------------------+-------------------------------------------+-----------------------+-----------+
| root             | *1234567890ABCDEF1234567890ABCDEF12345678 | mysql_native_password | localhost |
| mysql.session    | *THISISNOTAVALIDPASSWORDTHATCANBEUSEDHERE | mysql_native_password | localhost |
| mysql.sys        | *THISISNOTAVALIDPASSWORDTHATCANBEUSEDHERE | mysql_native_password | localhost |
| debian-sys-maint | *AF8E40088B96EC190F9F1F606BC5CBEC293E26FE | mysql_native_password | localhost |
+------------------+-------------------------------------------+-----------------------+-----------+
mysql> exit
設定できていれば以下のコマンドで root でログインできるはず。
$ mysql -u root -p
MySQL サーバーに root でログインして WordPress 用のユーザーとデータベースを作成しよう。
mysql> CREATE DATABASE wordpress;
mysql> GRANT ALL ON wordpress.* to wordpress@localhost IDENTIFIED BY 'PASSWORD';
mysql> FLUSH PRIVILEGES;
WordPress のインストールと設定
最後に WordPress をインストールしよう。
$ cd ~/public_html/example.com/
$ wget https://wordpress.org/latest.zip
$ unzip latest
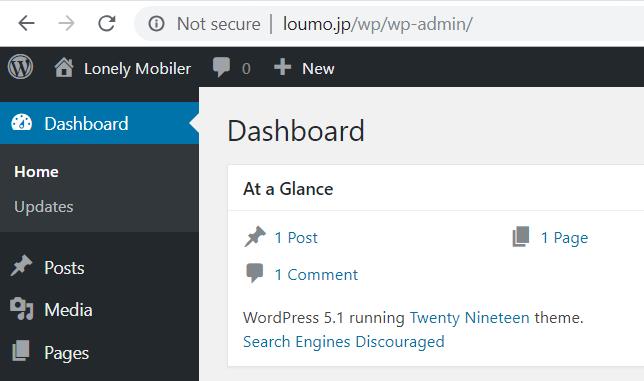
WordPress のインストール自体はこの状態で http://example.com/wordpress にアクセスし、データベースやサイト名などの設定を行えば完了する。
これだけでも動くといえば動くが nginx の設定を行うことでキャッシュやディレクトリ毎のアクセス制限を細かく指定可能となる。
例えば /etc/nginx/global/wordpress.conf という設定ファイルを作り、以下のように記述する。
location ~* /wordpress/uploads/.*\.php$ { deny all; }
location ~* /wordpress/files/.*\.php$ { deny all; }
location ~* /wordpress/akismet/.*\.php$ { deny all; }
location /wordpress/wp-content/cache/ { deny all; }
location ~ ~$ { deny all; }
location /.git { deny all; }
location /.htaccess { deny all; }
location /.htpasswd { deny all; }
location /.user.ini { deny all; }
# this actually covers every dot file, except what follows below it (ex: CertBot)
location ~ ^/\. { deny all; }
# but allow CertBot - see http://stackoverflow.com/a/34262192
location ^~ /.well-known/acme-challenge {
    auth_basic off;
    try_files $uri =404;
    expires -1;
}
## This should be in your http block and if it is, it's not needed here.
index index.php;
location = /favicon.ico {
        log_not_found off;
        access_log off;
        expires max;
}
# robots.txt fallback to index.php
location = /robots.txt {
# Some WordPress plugin gererate robots.txt file
    allow all;
    try_files $uri $uri/ /index.php?$args @robots;
    access_log off;
    log_not_found off;
}
location / {
        # This is cool because no php is touched for static content.
        # include the "$is_args$args" so non-default permalinks doesn't break when using query string
        try_files $uri $uri/ /index.php$is_args$args;
}
# sites-available/example.com 内にある php 関連の設定は削除しておく。
location ~ \.php$ {
        #NOTE: You should have "cgi.fix_pathinfo = 0;" in php.ini
        #include fastcgi.conf;
        include snippets/fastcgi-php.conf;
        fastcgi_pass unix:/var/run/php/php7.2-fpm.sock;
        fastcgi_intercept_errors on;
        #fastcgi_pass php;
        fastcgi_buffers 16 16k;
        fastcgi_buffer_size 32k;
}
location ~* \.(js|css|png|jpg|jpeg|gif|ico)$ {
        expires max;
        access_log off;
        log_not_found off;
}
前半はアクセスブロック用の設定、後半はキャッシュとかなんかいろいろ。
これを sites-available/example.com から include global/wordpress.conf; で呼び出すようにすると複数の WordPress サイトを設定するときに便利。
これで Nginx で WordPress が動くようになった。
-- 参考 URL
How To Install Linux, Nginx, MySQL, PHP (LEMP stack) on Ubuntu 18.04 | DigitalOcean
WordPress | NGINX
Nginx « WordPress Codex

コメント