以前開発したホテル検索サイトではオートコンプリート機能を実装する際 react-autosuggest を利用した。
GitHub - moroshko/react-autosuggest: WAI-ARIA compliant React autosuggest component
実装例は以下で確認できる。

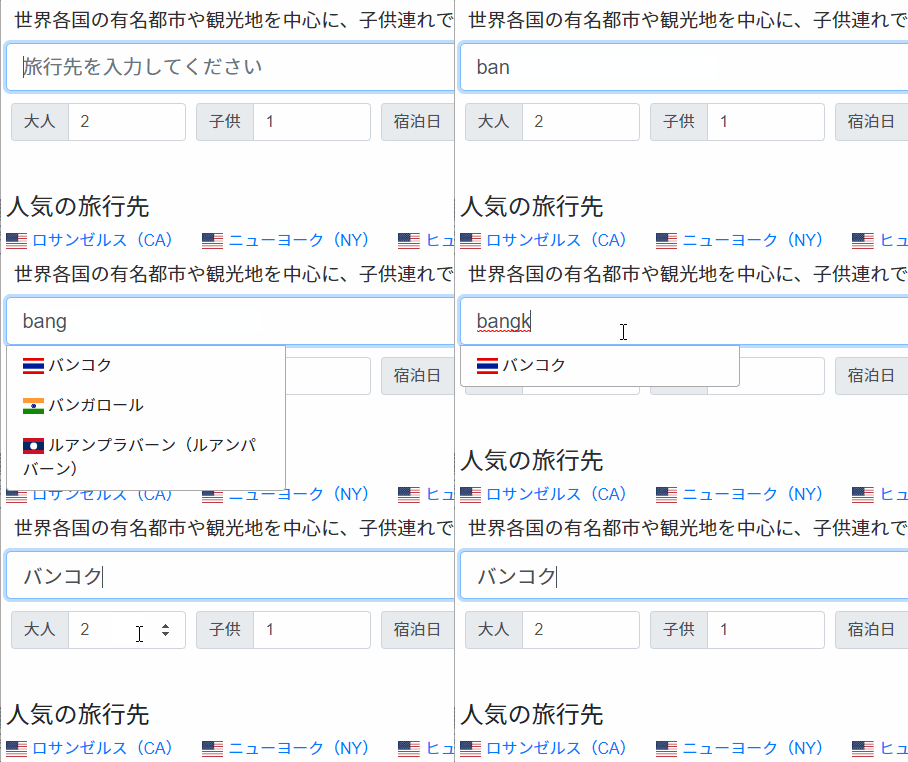
このような感じに都市名を入力するとデータベースを検索して候補を一覧で返す。国旗の表示や日本語表示であっても英語で検索できるなど、自分で言うのもなんだが結構便利だと思う。
このページでは react-autosuggest の使い方を簡単にではあるが紹介しよう。
簡単な利用方法
インストールは yarn か npm コマンド, もしくは autosuggest.js を直接読み込む。
$ yarn add react-autosuggest
$ # or
$ npm install react-autosuggest --save
<script src="https://unpkg.com/react-autosuggest/dist/standalone/autosuggest.js"></script>
ちょっと動作確認するだけなら codepen が楽。

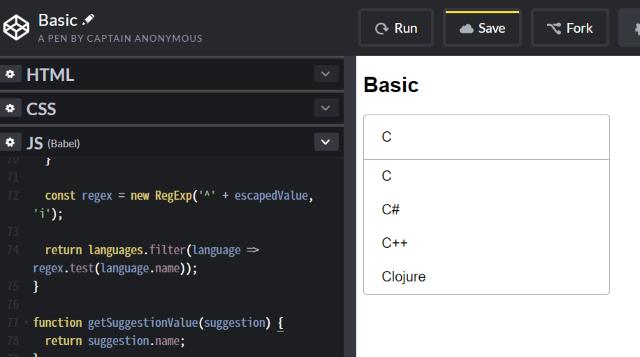
以下 codepen にあった例を解説していこう。
React Autosuggest Basic Example
まずオートコンプリートしたいテキストのリストを用意する。以下は連想配列の配列だが配列であれば何でも良いっぽい。
const languages = [
  {
    name: 'C',
    year: 1972
  },
  {
    name: 'C#',
    year: 2000
  },
  {
    name: 'C++',
    year: 1983
  },
//...
];
上記リストから検索する際に文字列を加工して検索しやすくする部分っぽい。検索には正規表現を利用しているが、記号も検索対象とするためにアレコレやっている。このへんは検索対象のリストによっては不要だろう。自分が実装した際も正規表現は利用していない。
// https://developer.mozilla.org/en/docs/Web/JavaScript/Guide/Regular_Expressions#Using_Special_Characters
function escapeRegexCharacters(str) {
  return str.replace(/[.*+?^${}()|[\]\\]/g, '\\$&');
}
function getSuggestions(value) {
  const escapedValue = escapeRegexCharacters(value.trim());
  if (escapedValue === '') {
    return [];
  }
  const regex = new RegExp('^' + escapedValue, 'i');
  return languages.filter(language => regex.test(language.name));
}
サジェストの結果を選んだ際にテキストボックスに表示されるテキストを決める部分。
function getSuggestionValue(suggestion) {
  return suggestion.name;
}
サジェストの各要素を表示する部分。
function renderSuggestion(suggestion) {
  return (
    <span>{suggestion.name}</span>
  );
}
オートコンプリートのコンポーネントを呼び出す。以下はコメント欄に記述する。
class App extends React.Component {
  constructor() {
    super();
    // 検索に利用するテキストと表示されるサジェスト一覧の
    // 配列を state として用意しておく
    // 検索のためにテキストを入力する都度それらの値は変化する
    this.state = {
value: '',
     suggestions: []
    };
  }
  // 検索用テキストに入力がある都度 setState で更新するやつ
  onChange = (event, { newValue, method }) => {
    this.setState({ value: newValue });
  };
// 入力したテキストに応じてサジェストの結果を絞り込む
  onSuggestionsFetchRequested = ({ value }) => {
    this.setState({ suggestions: getSuggestions(value) });
  };
  // サジェストの結果をクリアする際に呼ばれる
  onSuggestionsClearRequested = () => {
    this.setState({ suggestions: [] });
  };
  render() {
    const { value, suggestions } = this.state;
    // Autosuggest に渡す引数
    const inputProps = {
       placeholder: "Type 'c'",
       value,
       onChange: this.onChange
    };
    // 全ての準備が出来たら Autosuggest を render しよう
    return (
      <Autosuggest
      suggestions={suggestions}
      onSuggestionsFetchRequested={this.onSuggestionsFetchRequested}
      onSuggestionsClearRequested={this.onSuggestionsClearRequested}
      getSuggestionValue={getSuggestionValue}
      renderSuggestion={renderSuggestion}
      inputProps={inputProps} />
    );
  }
}
ReactDOM.render(<App />, document.getElementById('app'));
こんな感じだ。設定項目は多く見えるが一つ一つ意味を理解すればすんなり実装できると思う。
ホテル検索サイトでの実装例
ホテル検索サイトではサジェスト対象は都市名となるので、500以上ある全ての都市を予めロードしておくことは現実的ではない。そのため文字列を入力される都度 API を fetch してデータベースから検索を行っている。
データベースへアクセスする以外の部分に関しては上記例と同様だ。
function getSuggestionValue(suggestion) {
  return suggestion.city_name;
}
// 単に都市名のみ表示するのではなく、
// 各都市名の前に国旗を表示して
// どこの国の都市なのかをわかりやすくしている。
function renderSuggestion(suggestion) {
  var flag_class = 'flag-icon flag-icon-' + suggestion.country_code.toLowerCase();
  return (
      <span>
      <span className="country-flag"><span className={flag_class}></span></span>
      <span>{suggestion.city_name}</span>
      </span>
       );
}
// テキストボックスに bootstrap のクラスを適用
// するために別途定義してあるのだが class 名だけ
// ならいらないのではないかとこの記事を各段階になって思い始めた
const renderInputComponent = inputProps => (
    <div>
    <input id="city-name-suggestion" className="form-control" {...inputProps} />
    </div>
    );
class CitySearchBox extends React.Component {
  constructor(props) {
    super(props);
    this.state = {
city_name: '',
       value: '',
       suggestions: [],
       isLoading: false
    }
    this.lastRequestId = null;
    this.handleCityName = this.handleCityName.bind(this);
    this.onChange = this.onChange.bind(this);
    this.loadSuggestions = this.loadSuggestions.bind(this);
    this.onSuggestionsFetchRequested = this.onSuggestionsFetchRequested.bind(this);
    this.onSuggestionsClearRequested = this.onSuggestionsClearRequested.bind(this);
    this.onSuggestionSelected = this.onSuggestionSelected.bind(this);
  }
  handleCityName(e) {
    this.setState({city_name: e.target.value});
  }
  // データベースへアクセスして都市名の一覧を取得している箇所
  // 文字入力の都度アクセスするのは負荷がかかる上に
  // 読み込み順などでいろいろ面倒なので3文字以上且つ
  // 読み込み中に文字入力があれば直前のリクエストを
  // キャンセルするようになっている
  loadSuggestions(value) {
    // Cancel the previous request
    if (this.lastRequestId !== null) {
      clearTimeout(this.lastRequestId);
    }
    if (value.length < 3) { return; }
    this.setState({ isLoading: true });
    this.lastRequestId = setTimeout(() => {
        fetch(`/api/city_name_suggestions?term=${value}`)
        .then((function(response) {
              this.setState({ isLoading: false });
              return response.json();
              }).bind(this))
        .then((function(data) {
              this.setState({ suggestions: data, });
              if (data.length > 0) {
              this.props.setCityNameForUri(data[0].city_name_for_uri);
              }
              }).bind(this));
        }, 500);
  }
  // このへんは例と同じだけど、
  // 他のコンポーネントと連携している部分があるので
  // props に関しては読み飛ばしてほしい
  onChange(event, { newValue }) {
    this.props.setCityNameSearch(newValue);
    this.setState({ value: newValue });
  };
  onSuggestionsFetchRequested({ value }) {
    this.loadSuggestions(value);
  };
  onSuggestionsClearRequested() {
    this.setState({ suggestions: [] });
  }
  onSuggestionSelected(event, { suggestion, suggestionValue, suggestionIndex, sectionIndex, method }) {
    this.props.setCityNameForUri(suggestion.city_name_for_uri);
  };
  render() {
    const { value, suggestions, isLoading } = this.state;
    const inputProps = {
         placeholder: I18n.t('searchbox.city_name_placeholder'),
         value,
         onChange: this.onChange,
         className: 'form-control form-control-lg'
    };
    const status = (isLoading ? 'Loading...' : 'Type to load suggestions');
    return (
        <div className="my-2">
        <Autosuggest
        suggestions={suggestions}
        onSuggestionsFetchRequested={this.onSuggestionsFetchRequested}
        onSuggestionsClearRequested={this.onSuggestionsClearRequested}
        onSuggestionSelected={this.onSuggestionSelected}
        getSuggestionValue={getSuggestionValue}
        renderSuggestion={renderSuggestion}
        renderInputComponent={renderInputComponent}
        inputProps={inputProps} />
        </div>
    );
  }
}
用意した API にアクセスしてサジェスト結果を取得している以外は殆ど例と同じだと思う。
react-autosuggest を利用するとこんな感じで簡単にオートサジェスト可能なフォームを作成できる。便利。


コメント