カメラを使ったアプリを作る機会があったので Unity 上で Web カメラをどうやって扱うのかを調べて動かしてみた。
カメラの画像を Unity 内で表示する
カメラを扱うには WebCamTexture を利用すると簡単に表示できる。WebCam と名前が付いてはいるが Android 等のカメラも普通に使える。
public class WebCameraController : MonoBehaviour {
    public int Width = 1920;
    public int Height = 1080;
    public int FPS = 30;
    void Start () {
        WebCamDevice[] devices = WebCamTexture.devices;
        // display all cameras
        for (var i = 0; i < devices.Length; i++) {
            Debug.Log (devices [i].name);
        }
        WebCamTexture webcamTexture = new WebCamTexture(devices[0].name, Width, Height, FPS);
        GetComponent<Renderer> ().material.mainTexture = webcamTexture;
        webcamTexture.Play();
    }
}
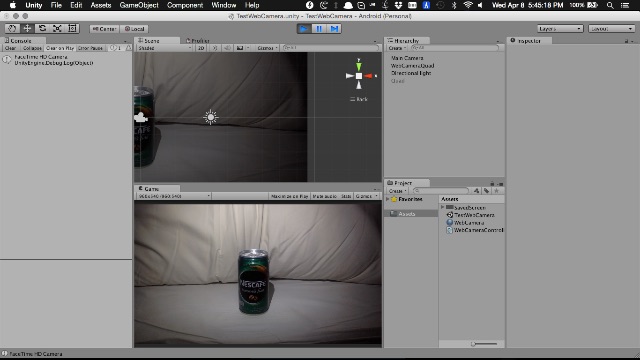
上記のスクリプトを適当な Plane か Quad に貼り付けて実行するとカメラの画像がそこにテクスチャとして表示される。

Macbook Air 内蔵のカメラを使ってます。適当な被写体が無かったので飲む直前の安い缶コーヒー(13バーツ)を映している。
簡単に解説すると
- WebCamTexture.devices でデバイス上にあるカメラを全て取得
- 使用するカメラの名前、解像度、FPS を WebCamTexture に渡す
- オブジェクトのテクスチャーに WebCamTexture を渡す
- Play メソッドを呼ぶ
という流れになる。
WebCamTexture.devices はカメラが複数ある場合に選択するといった場合に使用するので一つしか使わないなら無くても良い。
new WebCamTexture する際の引数だがこれもあってもなくても良い。カメラの指定が無ければ devices で最初の要素が使われるし、解像度や FPS もデフォルトの値が使われる。
またドキュメントによると、Web プレーヤーで使用する場合は Application.RequestUserAuthorization を WebCamTexture 作成前に呼ぶ必要がある(らしい、試して無い)
カメラの画像を切り出してテクスチャーとして使う
上記例ではカメラの映像をリアルタイムで Unity で表示しているが撮影したものをテクスチャーとして利用するにはどうすれば良いのか。
ドキュメントを見ながら考えたところ、WebCamTexture の GetPixels32 メソッドを使用してピクセルデータを取得、Texture2D の SetPixels32 メソッドでテクスチャーにセットする方法を思いついた。
コードは以下のような感じ。
using UnityEngine;
using System.Collections;
public class WebCameraController : MonoBehaviour {
    public int Width = 1920;
    public int Height = 1080;
    public int FPS = 30;
    public WebCamTexture webcamTexture;
    public Color32[] color32;
    void Start () {
        WebCamDevice[] devices = WebCamTexture.devices;
        webcamTexture = new WebCamTexture(devices[0].name, Width, Height, FPS );
        GetComponent<Renderer> ().material.mainTexture = webcamTexture;
        webcamTexture.Play();
    }
    void Update () {
        if (Input.GetKeyDown (KeyCode.Space) || Input.touchCount > 0) {
            color32 = webcamTexture.GetPixels32();
            Texture2D texture = new Texture2D(webcamTexture.width, webcamTexture.height);
            GameObject.Find("Quad").GetComponent<Renderer>().material.mainTexture = texture;
            texture.SetPixels32(color32);
            texture.Apply();
        }
    }
}
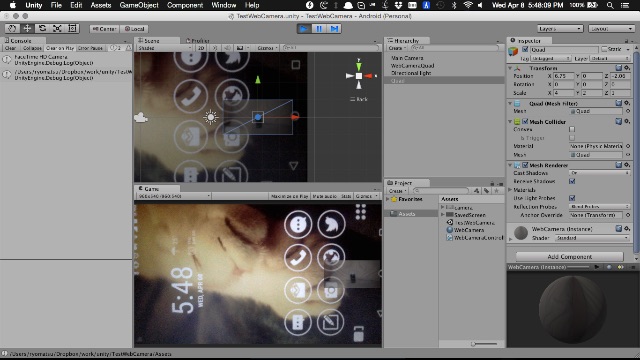
スペースキーを押す、もしくは画面をタップすると Quad と名前のついたゲームオブジェクトを探して現在カメラに写っている映像をテクスチャーとして貼り付ける。
もっと良い方法あるだろうか。
WebCamTexture から切り出した画像の色を変更する
上記スクリーンショットでは撮った画像が半透明になっている。
WebCamTexture より取得した color32 は色データ Red, Green Blue そして Alpha を持つので例えば texture.SetPixels32 を呼ぶ前に以下のように画像の色を変える事ぐらいなら簡単に実行できる。
for (int i=0; i<color32.Length; i++) {
	color32[i].a = 128; //アルファ値を加えて画像を半透明にしてる
}
texture.SetPixels32(color32);
texture.Apply();
Texture2D を画像化してファイルの保存を行う
さらに、Texture2D は jpg や png 化する事もできるので、以下のようにしてファイルに保存する事ができるし、サーバ上にアップロードするなども可能となる。
var bytes = texture.EncodeToPNG();
File.WriteAllBytes(Application.dataPath + "/camera.png", bytes);

アルファ値をいじったのでちょっと薄い画像となった。


コメント
[…] Unity で Web カメラを使用するカメラを使ったアプリを作る機会があったので Unity 上で Web カメラをどうやって扱うのかを調べて動かしてみた。カメラの画像を Unity 内で表示するカメラを扱うには WebCamTexture を利用すると簡単に表示できる。Webloumo.jp […]